SPM-Nanoa - Features
Scanning Probe Microscope/Atomic Force Microscope
Automatic Observation
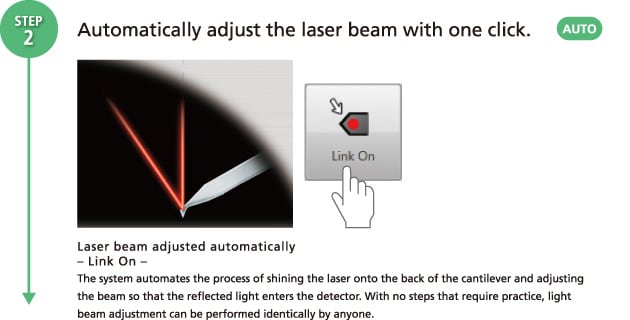
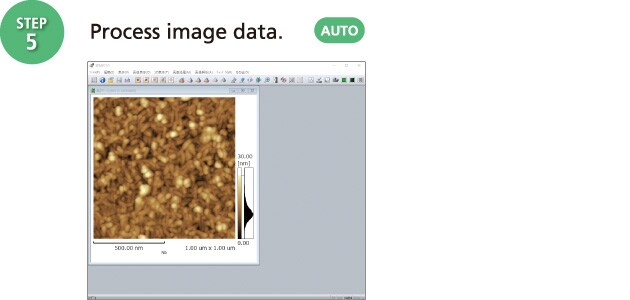
Adjusts Laser Beam, Adjusts Parameter Settings During Observation, and Performs Image Processing Automatically
Operating time when using standard samples and standard cantilever: about 5 minutes*
* For automatic observation with 1 μm square field of view and 256 × 256-pixel resolution. Operating times can vary depending on the operator.

Previous SPM systems required practice adjusting the light beam, adjusting parameter settings during observations, and processing image data, but the SPM-Nanoa automates those processes to help ensure stress-free operations.

Extensive Functionality
Capture Sharp Images with All Modes from Optical to SPM Microscopy
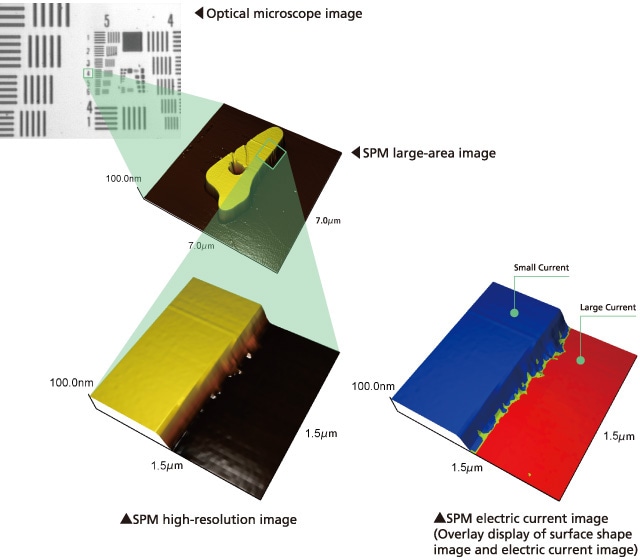
Targets can be searched by an optical microscope, and magnified observation is facilitated by SPM.
Other physical property information can be obtained with the same field-of-view as the surface shape image.
Sample: SiO2 patterns on Si
Wide Variety of Observation Modes
Supports a wide variety of observation modes, from observing shapes to mapping physical properties based on force curve measurements.
That means physical properties can be evaluated with high resolution.
| Shape | Contact Mode / Dynamic Mode |
|---|---|
| Mechanical Properties | Phase Mode / Lateral Force Mode (LFM) / Force Modulation Mode / Nano 3D Mapping Fast* |
| Electromagnetivity | Electric Current Mode* / Magnetic Force Mode (MFM)* / Surface Potential Mode (KPFM)* / Piezoelectric Force Mode (PFM)* / STM* |
| Machining | Vector Scanning* |
| Atmospheric Control | Observation in Liquid* |
* Optional
Search for Targets Easily
Targets can be searched for easily in sharp optical microscope images without vibration effects.
The SPM-Nanoa combines a high-performance optical microscope and SPM unit in a single integrated system.
View Test Patterns
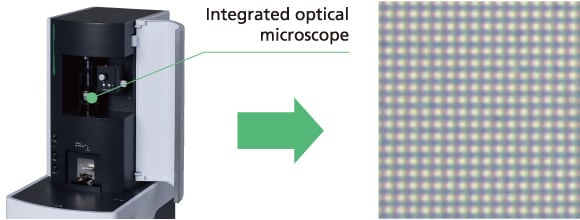
With the integrated optical microscope (left), the periodic structure of a 3 μm interval on the sample surface can be clearly observed.
Observe Localized Physical Properties with High Resolution
The deformation of extremely soft samples or differences in the mechanical or electrical properties of samples can be observed with high resolution, even if such characteristics are localized.
KPFM Mode Observation of Gold Nanoparticles on Mica Substrate
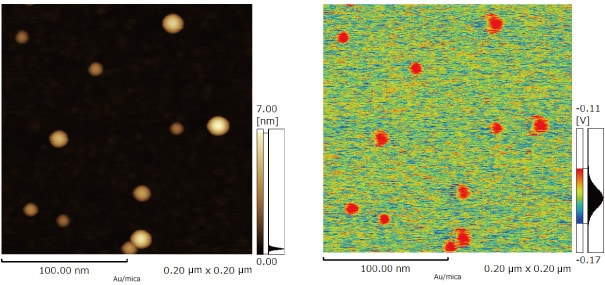
This shows a surface potential image (right) acquired with the same field-of-view as a 0.2 μm shape image (left).
8K Images Enable High-Resolution Observation of Large Areas
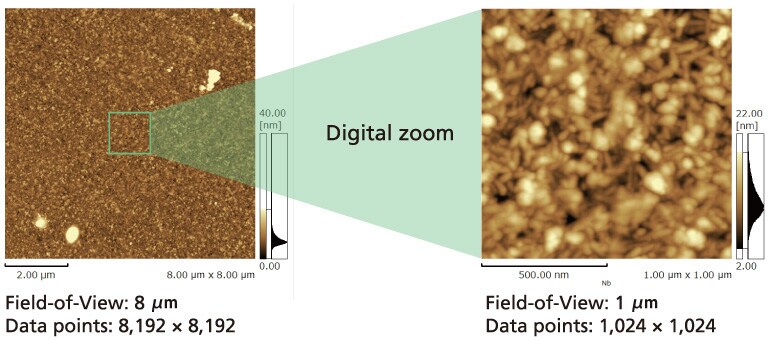
Detailed structures can be observed even in images of large areas. High-resolution observation is achieved with up to 8K (8192 × 8192) pixels.
Observation of Vapor-Deposited Metal Coating
Saves Time
Various Support Functionality Achieves Fast Observation
Observation times have been significantly shortened with faster observation and physical property-mapping processes.
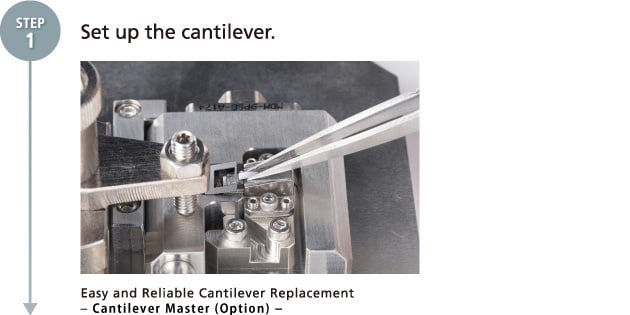
Simple sample and cantilever replacement processes ensure the system can be prepared for observations quickly.
Three functions enable significantly shorter observation times.
High-Throughput Observation
Fast Physical Property Mapping
The data acquisition time required for observation and mapping physical properties has been significantly shortened by using a high-throughput scanner that achieves a fast response and by optimizing the control algorithm.
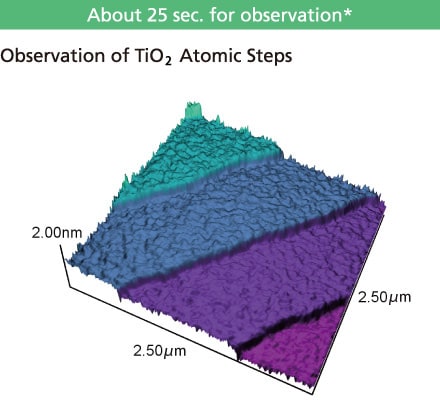
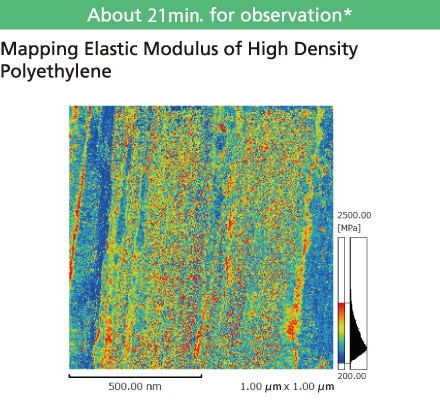
* Actual observation times will vary depending on parameter settings.
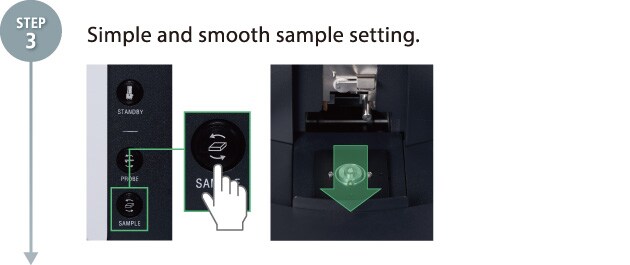
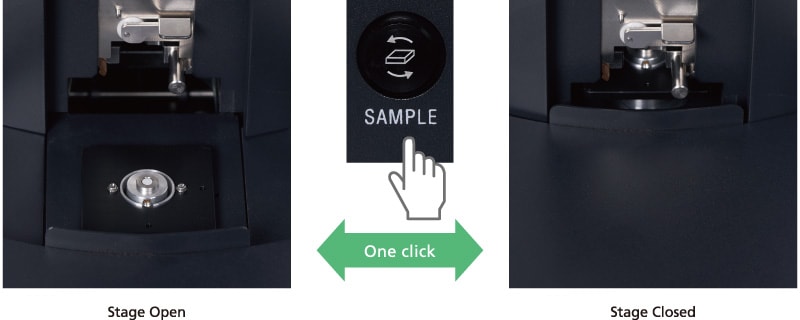
Simple & Smooth Sample Replacement
Samples can be placed and removed by opening/closing the stage with a single click. Because the system maintains the laser beam position, samples can be observed immediately after replacement.
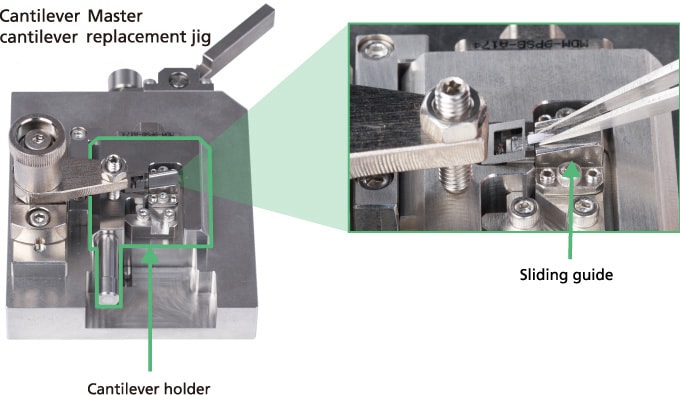
Easy and Reliable Cantilever Replacement –Cantilever Master (Option)–
Cantilevers can be installed by simply placing the cantilever in the specified position and then sliding it along the guide. That ensures cantilevers can be replaced easily and reliably even by operators not used to using tweezers.
