XDimensus 300 - Features
Dimensional X-Ray CT System
High Accuracy
The XDimensus 300 provides the highest level of sphere distance accuracy, with a measurement error of (3.8 + L/50)* μm.
In addition to Shimadzu's proprietary microfocus X-ray generator and a detector with high resolution and a wide field of view, it is equipped with an air conditioning unit to maintain a constant temperature inside the instrument, a granite frame that provides high geometric stability, and an ultra-high-accuracy sample positioning stage, thereby achieving highly accurate measurements.
*Example: A 5.8 μm error for L =100 mm
Proprietary Microfocus 225 kV Generator
The system is equipped with a high output microfocus X-ray generator, which generates 225 kV. X-ray focal point drift caused by heat is corrected in real time.
Detector with High Resolution and a Wide Field of View
A 16-inch high-resolution at panel detector has been adopted. It achieves both high resolution and a wide field of view
Self-Diagnostic Function
The system is equipped with a self-diagnostic function to monitor the system status. The operator is notified of the system status in real time.
Ultra-High-Accuracy Rotating Stage
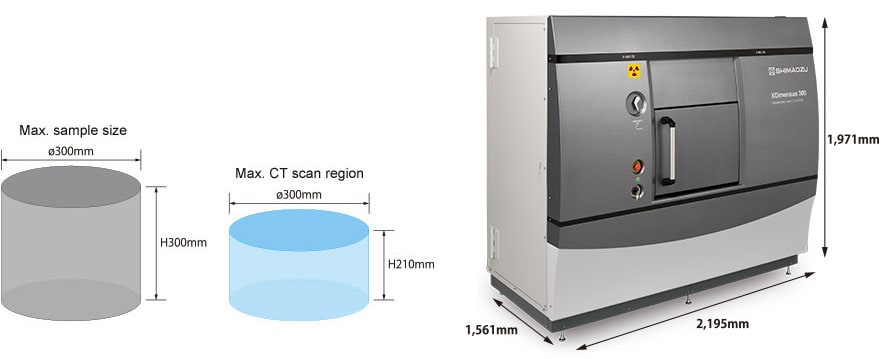
Air bearings have been adopted for the rotating stage. A loading sample size of 300 mm in diameter and 300 mm in height has been achieved while minimizing problems with shaft eccentricity.
Shield Box Internal Temperature Control Device
The system is equipped with a temperature control system, which controls the temperature inside the shield box. A thermostatic room is not required, so it is not necessary to be as selective about the installation site.
Large Measurement Volume in Compact Cabinet
ø300mm × H210mm
Cabinet size
W: 2,195 mm × D: 1,561 mm × H: 1,971 mm
With its compact housing, 2.2 m wide and 1.6 m deep, it can be installed in an area a mere 3.5 m long and 4 m wide.
Although the housing is small, it provides measurements of samples 300 mm in diameter.

Quick and Easy Operation
No calibration process is necessary before scanning. Corrections are performed in real time during data collection, so scanning can start immediately after sample placement. With its new user interface, the operator can start scanning without complicated parameter settings.
1. Sample Placement
Load the sample of interest onto the stage. Samples up to 300 mm in diameter can be loaded and observed.

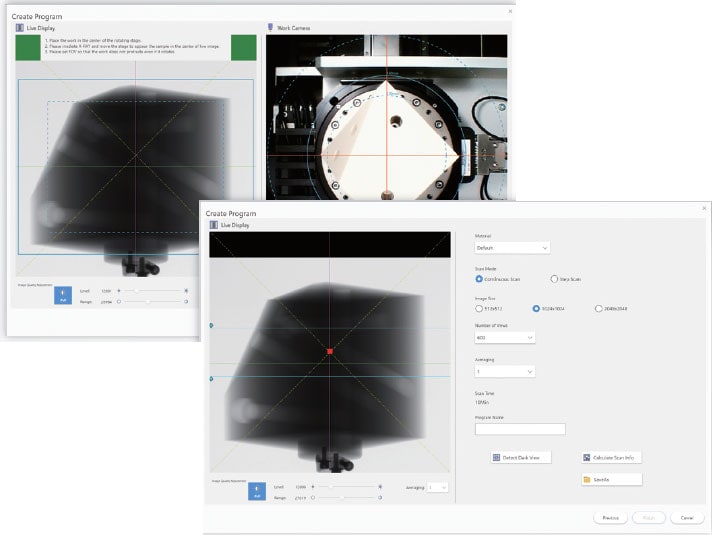
2. Set the Scan Field of View and Parameters
Determine the positioning and field of view using a software wizard.

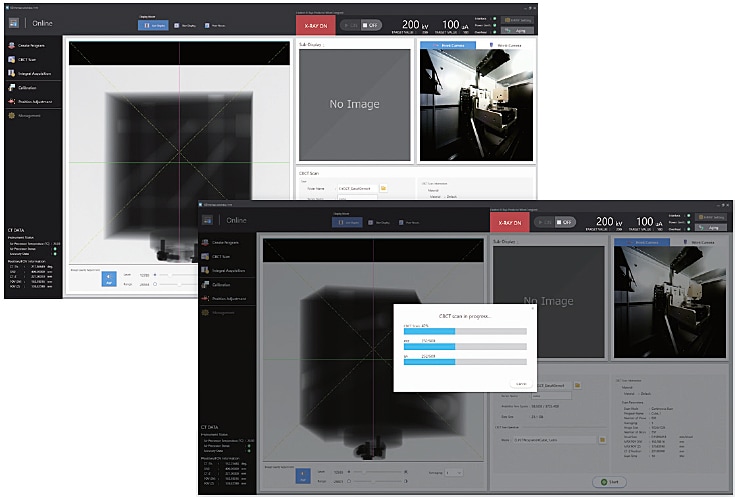
3. CT Scan and Reconstruction
Just select the scan parameters, and click [Start] to start the CT scan. Calibration is not required.

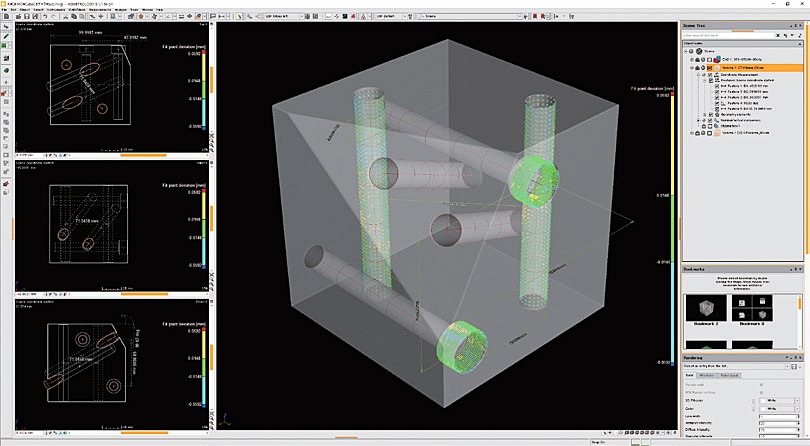
4. 3D Measurement
Various measurements are performed with 3D data obtained using the 3D image processing software.


