AGX-V2 Series - Features
AUTOGRAPH Precision Universal Tester
Aggregation of Cutting-Edge Functions
Revolutionary Technology Provides Full Control
Ultra-high-speed Ultra-high-response
data sampling crosshead control
10kHz × 1kHz
Equipped with Multi Processors and Multi Engines, Providing Ultrafast Data Acquisition and High Response Control
Shimadzu’s proprietary control box is equipped with two processors and three engine units. It provides 1 kHz high response crosshead control and 10 kHz high-speed data sampling through high-level simultaneous parallel processing, based on a meticulous timing design, and the allotment of various communications, measurement, and control functions across multiple devices.
Leave Strain Rate Control to the Machine by Utilizing New Autotuning
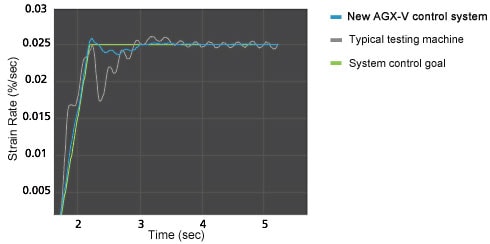
High-accuracy control is maintained under noisy, highly disturbed conditions, something that was hard to provide with conventional autotuning.
This high-level autotuning is achieved by using not only feedback measurement values but all measurement values in the calculations for real-time updates of the control model.
[Steel and Nonferrous Metal Testing]

Strain rate control, in which the rate of deformation measured by an extensometer is controlled to be constant, requires highly accurate control to follow rapid changes in material behavior.
Metal Tensile Test Standard: ISO 6892(JIS Z 2241) specifies that the allowable range of increase in strain to the yield point is ± 20% or less. The strain rate control specified in ISO 6892(JIS Z 2241) is possible*1 to achieve with the AGX-V2 for many materials.
[Practical Simulation Testing]

To maintain engine mounts and other rubber materials at a constant test force, it is necessary to gradually change the retention position to suit the characteristics of the test sample. In order to maintain the test force at a constant value, high control stability is required, with high control responsiveness and no vibrations generated due to excessive response.*2
[Free Running Compression Testing]

Stable control is achieved even in free running compression tests. In these tests, the compression indenter or bending punch is allowed to run free until it makes contact with the sample, at which point the load is increased up to a set test force.
The overshoot of the target value is reduced, even in free running compression tests of highly rigid materials, resulting in high-accuracy test force retention.*2
*1 The graph is an example. The control accuracy may vary depen ding on the material properties and the surrounding environment . It does not guarantee accuracy.
*2 The graph is an example. The state of control can vary depen ding on the material properties and the surrounding environment.
Wider Range, More Detail, More Variety
Ultra-high-speed data sampling
10kHz
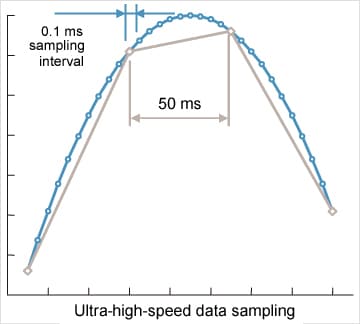
Captures Instantaneous Changes
The ultra-high-speed sampling function has progressed up to a sampling rate of 10 kHz (0.1ms). Sudden and tiny changes, such as when brittle materials break, can now be assessed.
Guaranteed test force range
1/2000
Reduces the Frequency of Load Cell Replacement
The guaranteed test force accuracy range has been enlarged to 1/2000 for an even wider range of data reliability. Even data from the very beginning of the test force application can be analyzed with confidence. Tests that previously required multiple load cell replacements to suit the test force are now supported by a single load cell, cutting back on replacement procedures and calibration expenses.
Maximum number of sensor inputs
20ch
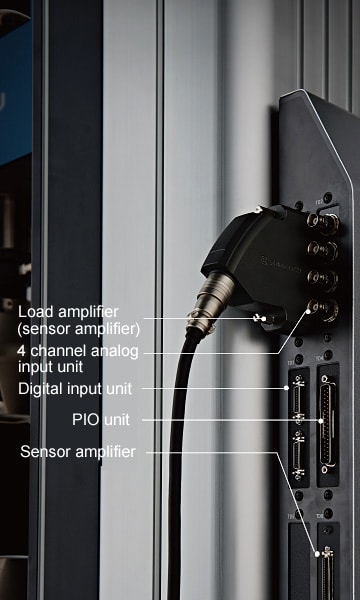
All the Data Are Synchronized and Acquired with High Accuracy A Data Logger is Not Required
The external input ports can be expanded to 20 channels. Analog input units and counter units can be selected, making it easy to acquire more data without a data logger. The load cell, extensometer, and external input ports are synchronized, and all channels are sampled simultaneously, improving the simultaneity of the data. This further improves the accuracy and reliability of the elastic modulus and other data calculated using two or more measurement values
Testing Machine Main Unit
Load Frame
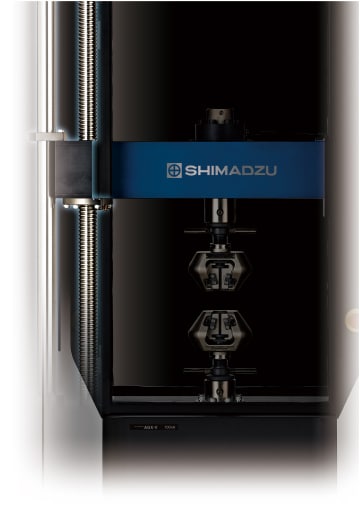
Frame Design Provides High Rigidity and High-Level Alignment
The newly designed guide column*1 is equipped with a support ring*1 that maintains a right angle with the table surface. As a result, measurement repeatability has been improved in tests of highly rigid materials and highly brittle materials, prone to the impact of frame rigidity or alignment, enabling stable testing.
Voice Operation Device
XV-Talk™
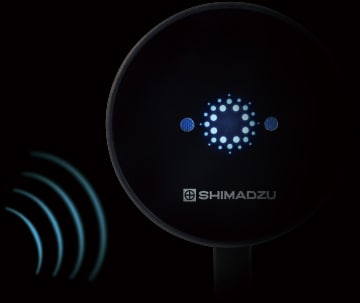
New Operability with Voice
The AGX-V2 responds to the operator’s voice.
The AGX-V2 operates in response to key phrases spoken by the operator. This frees the operator from frequently used buttons, such as "Start Test" and "Return."*2*3
*1 Available floor models range from 20 kN to 300 kN.
*2 Use the voice operation function when the noise is 55 dB(A) or less. Voice operations may not work when the background noise is high.
*3 Without a safety cover, some voice control functions are limited.
True Safety for both the Operator and the Machine
Safety Cover
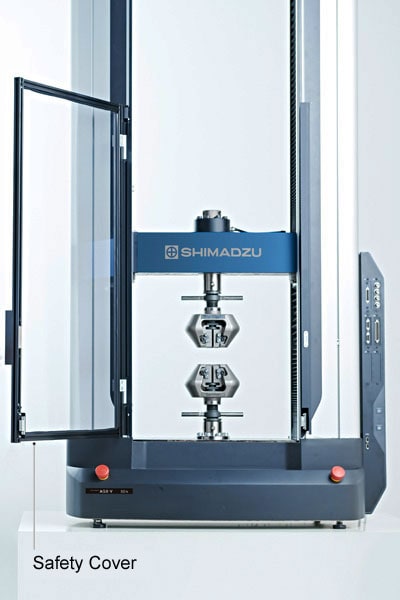
Protects Operators from Debris
Highly transparent, impact-resistant polycarbonate safety covers are provided as standard for the front and rear of the test space. This prevents samples from flying out when they break. An interlock function is provided, so that if the safety cover is not closed, testing and the return operation are prevented, reducing the risk of accidents.
• Using optional accessories, all movement including the jog operation can be prohibited.
Intelligent Crosshead
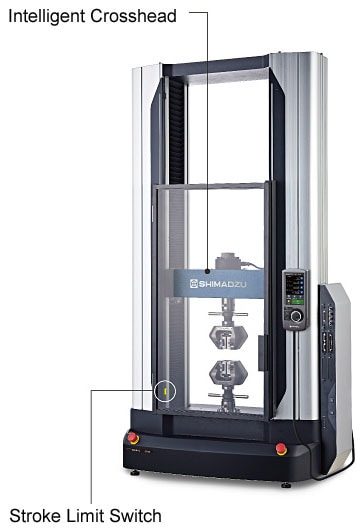
Prevents Jig Impacts
The intelligent crosshead always recognizes its current position. If the jigs get too close due to an operational error, an impact warning is issued, and the crosshead is stopped automatically.
Contact Detection and Instantaneous Emergency Stop
The machine status is diligently monitored even when the crosshead is moved with the safety cover open, such as when adjusting the position of test jigs or attaching samples. If the machine detects the test force changes due to contact with jigs or hands, the crosshead performs an emergency stop.
Overload Detection Function
If the machine detects a test force exceeding the load cell capacity, the crosshead stops automatically. This reduces the risk of load cell damage from overloads during the jog operation and during testing. (Note that the possibility of damage cannot be completely eliminated.)
Stroke Limit Switch
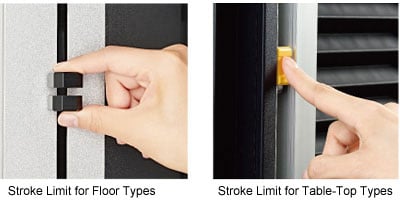
Pinch, Position, and Release Grips
A stroke limit switch, which sets the limits of crosshead movement, prevents crosshead and jig impacts. A spring mechanism within the switch reliably sets the position when the hand is released, preventing configuration errors due to procedural mistakes such as insufficient tightening.
Self Check Function
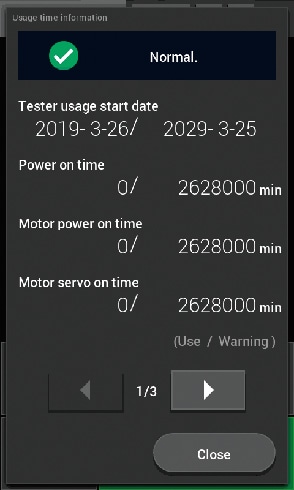
Machine’s Self-Diagnostic Function
The function constantly monitors sensor amplifler calibration information, the operational status of the testing machine, the power supply voltage, and the communications status. The user is immediately notifled when a problem occurs. Additionally, the usage time and number of uses of the machine are checked, and a notification is issued when prescribed values are reached. This assists with the assessment of maintenance periods and helps reduce downtime. (It does not detect offsets in measurement values from load cells and extensometers due to age-related changes. Periodic maintenance and inspections by a field engineer are recommended.)
Operability that Takes the Shortest Path to Results
All Jigs are Easily Connected
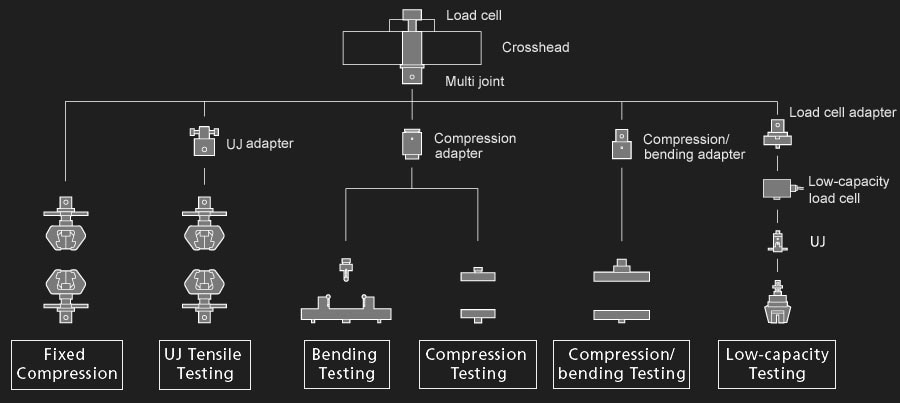
The multi joint, which connects jigs to load cells, enables all jigs, including tensile, compression, and bending jigs, to be connected easily. The replacement of heavy joints is no longer needed, which simplifies the replacement of test jigs. A small-capacity load cell can be connected to the tip, so tests with small-capacity load cells can be performed with a large-capacity load cell attached as is.
Smart Controller
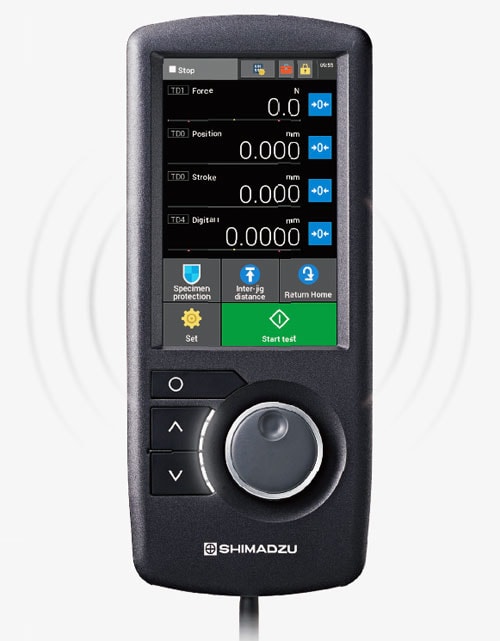
The controller is equipped with a touch panel LCD, which displays the optimal buttons and information for the situation. It shows a variety of operations and informational displays, including jig space adjustments prior to testing and confirmation of measurement values during tests. A universal interface standardized with the software has been adopted to support all kinds of testing by high operability and visibility.
Selection of operation sound according to environment
The special AUTOGRAPH operational sounds are adjustable. Select from a pleasant sound quality enhancing operational comfort or a sound that is easy to hear even in noisy conditions. (The sound can also be turned OFF.)
Voice alerts
A voice message warns the operator before the crosshead moves, preventing mistakes by the operator. (The sound can also be turned OFF.)
Finish Settings and Operations with a Hand-Held Controller
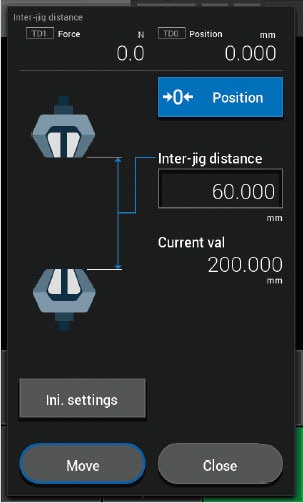
Configure Optimal Grip Space Automatically
With the intelligent crosshead function, the crosshead moves to ensure a user-defined jig separation. The jig separation is constantly monitored to prevent impacts between jigs. (The jigs must be pre-registered.) Additionally, the jig separation movement can be performed automatically in accordance with the test conditions by interlinking it with TRAPEZIUMX-V.
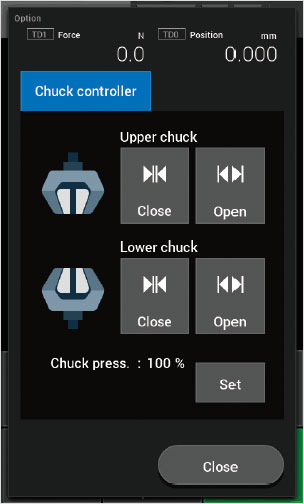
Perform the Opening/Closing of Grips from a Single Controller
Using a hand-held controller, both pneumatic and hydraulic type grips can be opened and closed automatically. This controller improves productivity since everything needed to prepare for measurements, from crosshead movement and testing conditions settings to hydraulic adjustments, can generally be implemented.
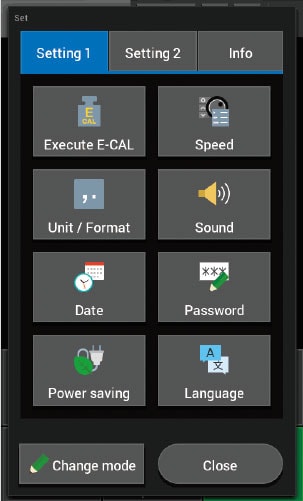
Check Detailed Settings with a Hand-Held Controller
The user can check the overview of the test conditions, set the sound, configure power saving settings, and set the system language. In addition to improving operational efficiency, pop-ups that check operations prior to movement reduce the risk of operational mistakes.


